Create a Semantic Segmentation Table from ADE20K
Ingest a small ADE20K subset into a 3LC table for semantic segmentation — the simplest case: paired images and grayscale label-map PNGs plus an id-to-name mapping.
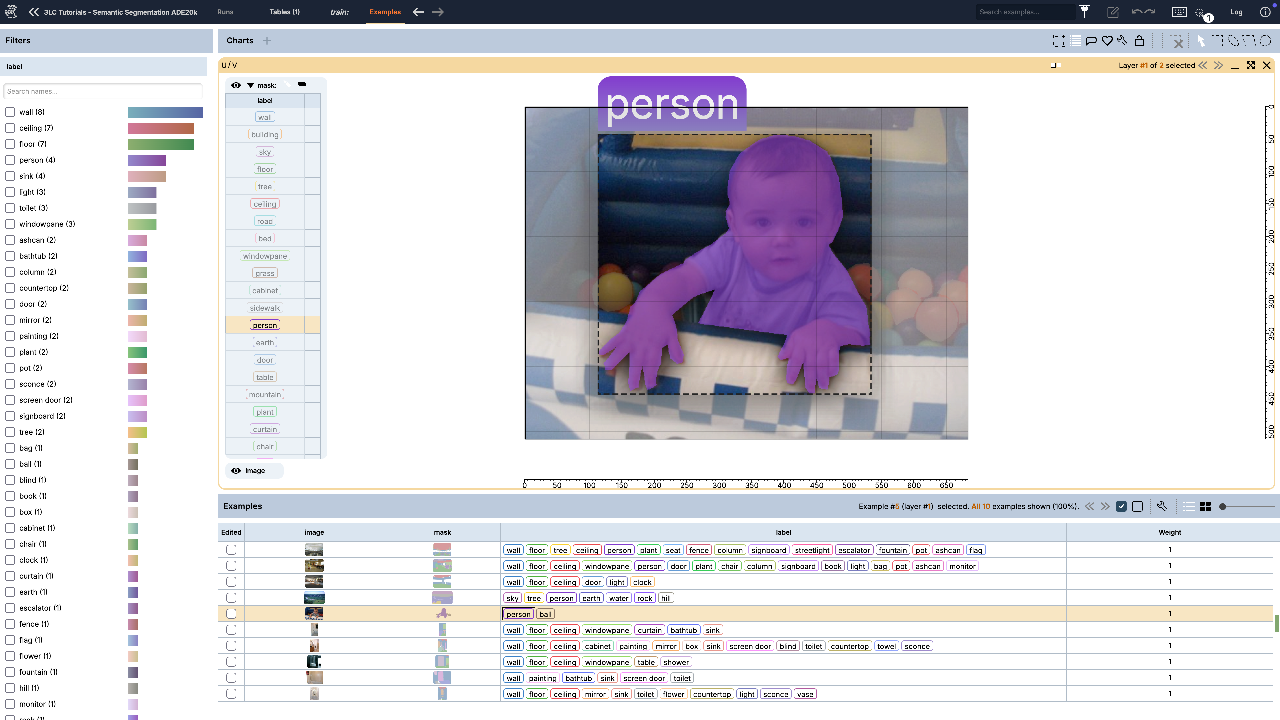
Semantic segmentation labels every pixel with a class. This is the minimal ingest path: point the documented front door Table.from_semantic_segmentation at the image files and their single-channel mask PNGs (whose pixel values are the class ids), together with the ADE20K label map. No decoding or remapping is needed — the front door reads the label-map PNGs directly. In ADE20K, id 0 marks the unlabeled region (pixels outside the 150 classes); we tag it as void so it is treated as an
ignore / don’t-care region and excluded from segmentation metrics.
For richer variants — a custom trimap split, or a 21-class problem with a training companion — see the create-oxford-pets-semseg-table and create-pascal-voc-semseg-table notebooks in this folder.
Project setup
[ ]:
# Parameters
PROJECT_NAME = "3LC Tutorials - Semantic Segmentation ADE20k"
DATASET_NAME = "ADE20k_toy_dataset"
TABLE_NAME = "train"
DOWNLOAD_PATH = "../../transient_data"  # dataset root; point at an existing copy to skip the download
INSTALL_DEPENDENCIES = True
Install dependencies
[ ]:
if INSTALL_DEPENDENCIES:
    %pip install -q 3lc huggingface-hub requests matplotlib
Imports
Download the dataset
The ADE20K toy subset is a small zip of paired images and grayscale mask PNGs. We download it only when it is missing, so a pre-seeded copy under DOWNLOAD_PATH is used as-is.
[ ]:
DATASET_ROOT = (Path(DOWNLOAD_PATH) / "ADE20k_toy_dataset").resolve()

if not DATASET_ROOT.exists():
    print("Downloading ADE20K toy dataset...")
    response = requests.get("https://www.dropbox.com/s/l1e45oht447053f/ADE20k_toy_dataset.zip?dl=1")
    response.raise_for_status()
    zipfile.ZipFile(io.BytesIO(response.content)).extractall(DOWNLOAD_PATH)
print("Dataset at", DATASET_ROOT)
Define the class universe
We pull ADE20K’s 150-class id -> name map from the Hugging Face Hub. That file is 0-indexed ("0" -> "wall", …), but the mask PNGs use id 0 for the unlabeled region and 1..150 for the classes, so we shift the class ids up by one and add unlabeled at id 0. Passing void=0 to the front door tags that region as a don’t-care / ignore class — it stays in the value map but is excluded from segmentation metrics like mean IoU. (ADE20K has no separate background class; every labelled
pixel is one of the 150 classes.)
[ ]:
with open(
    hf_hub_download(
        repo_id="huggingface/label-files",
        filename="ade20k-id2label.json",
        repo_type="dataset",
    )
) as f:
    id2label = json.load(f)

# Shift the 0-indexed HF map up to the PNGs' 1-indexed class ids, and add the unlabeled (void) region at id 0.
VOID_ID = 0
classes = {VOID_ID: "unlabeled", **{int(k) + 1: name for k, name in id2label.items()}}
print(f"{len(classes)} classes incl. unlabeled/void (e.g. 1={classes[1]}, 2={classes[2]})")
Locate the image/mask pairs
The images and masks share a filename stem across parallel images/ and annotations/ folders. We sort both so they line up positionally, then hand the file paths straight to the front door.
Write the table
Table.from_semantic_segmentation reads each mask PNG as a dense (H, W) label map and writes an image column plus an RLE-backed mask column in one call.
[ ]:
table = tlc.Table.from_semantic_segmentation(
    images=image_paths,
    masks=mask_paths,
    classes=classes,
    void=VOID_ID,
    project_name=PROJECT_NAME,
    dataset_name=DATASET_NAME,
    table_name=TABLE_NAME,
    if_exists="overwrite",
)
print(f"Wrote {len(table)} rows -> {table.url}")
Inspect a sample
Reading a row back hands you the source image and the dense mask. We overlay them to sanity-check the alignment.
[ ]:
import matplotlib.pyplot as plt

sample = table[0]
seg = sample["mask"]
print("Classes present:", [classes[c] for c in seg.present_class_ids.tolist()])

image = sample["image"]
fig, axes = plt.subplots(1, 2, figsize=(10, 4))
axes[0].imshow(image)
axes[0].set_title("image")
axes[1].imshow(image)
axes[1].imshow(seg.mask, alpha=0.5, cmap="tab20", interpolation="nearest")
axes[1].set_title("segmentation")
for ax in axes:
    ax.axis("off")
plt.tight_layout()
plt.show()
Next steps
The table is now in your 3LC project — open it in the 3LC Dashboard to browse the images and their segmentations.
For an end-to-end training example on the same sample type, continue with the Oxford-IIIT Pets pair (create-oxford-pets-semseg-table + pytorch-oxford-pets-unet-training).